Knowledge Base
How to Install cPanel
cPanel ranks as the premier Hosting Control Panel in the web hosting domain. Its installation is straightforward.
Prerequisites:
A pristine installation of either Ubuntu or AlmaLinux OS on your VPS/Server.
Steps for cPanel Installation:
- Access your VPS/Server using an SSH Client.
- Execute the command below by pasting it into your SSH terminal and hitting Enter.
cd /home && curl -o latest -L https://securedownloads.cpanel.net/latest && sh latest - The cPanel installation process will commence, typically spanning 10 to 20 minutes.

- Upon completion, the terminal will relay a confirmation: cPanel Installation Finished.
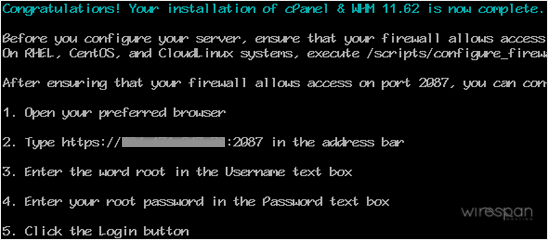
- Navigate to https://your-server-IP-here:2087 to access WHM.
- Provide the root username and password.
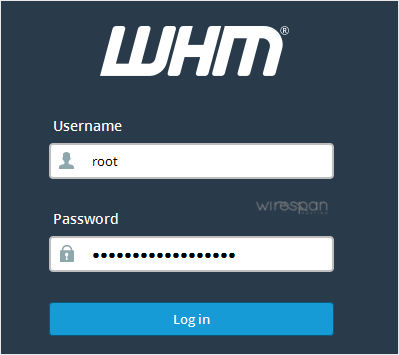
- Select Login.
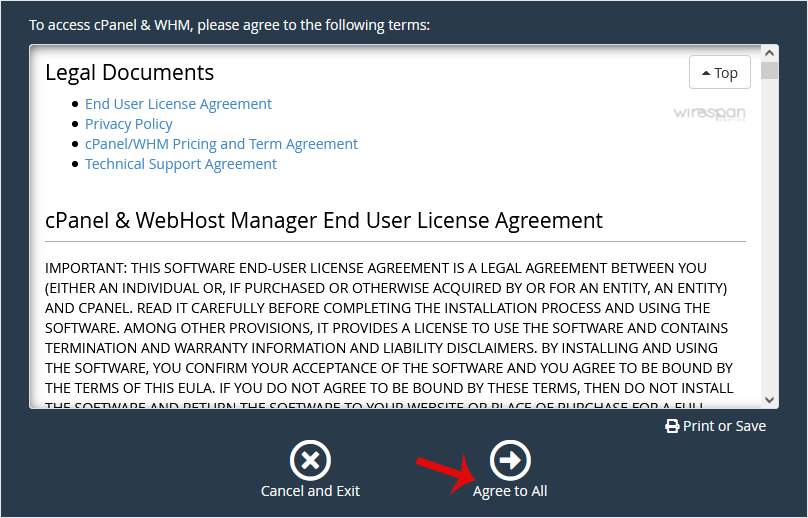
cPanel/WHM Setup Guide:
Step 1: Review and accept the terms.
Step 2: In cases where the cPanel license isn’t active, you might need to sign in to the cPanel store to activate a trial license.
Step 3: Configure Email and Nameservers:
Email Address: Input your email. This will be the recipient for cPanel alerts.
Nameservers: Input domain nameservers, like ns1.example.com and ns2.example.com. Ensure to substitute example.com with your actual domain.
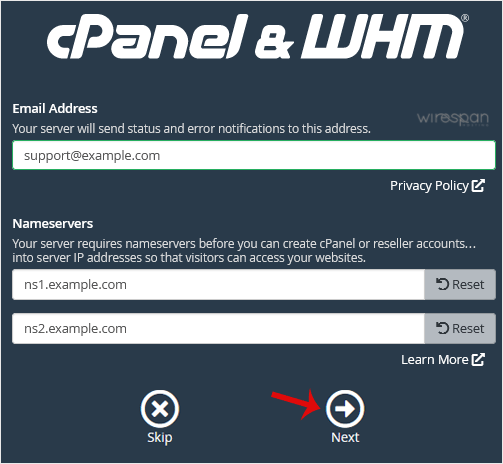
Conclude by selecting Next.
Well done! You’ve successfully installed cPanel. Your next steps include tasks like Easy Apache compilation, adjusting settings, firewall installation, and more.


Supercharge Your Website!
Lightning-fast Speed, Robust Security, and Expert Support.
